Table of Contents
Custom properties
Each object type in Feng Office has its set of properties (attributes or fields) predefined by the developers. These attributes cover the most common data you may want to fill in and store, however, sometimes you have specific needs and this is when custom properties come handy, making the system even more flexible.
Custom properties are searchable like standard properties and they can be used when creating and running reports.
Advantages of custom properties
Custom properties will guide users when entering data, because they make clear what data is expected, and because they can restrict the data entered. This supports the user and improves the data quality.
As an administrator you should consider to define specific custom properties whenever there are properties that are common to a number of records in your database. If you use Feng Office to store your business partners and clients, it's probably a good idea to define the tax number as a custom property for companies because you will need it quite often. On the other hand you probably won't define a custom property for opening hours just because you have one or two restaurants in your database - here a generic custom property will do the job.
Defining custom properties
To define custom properties, go to the administration panel an click Custom Properties:
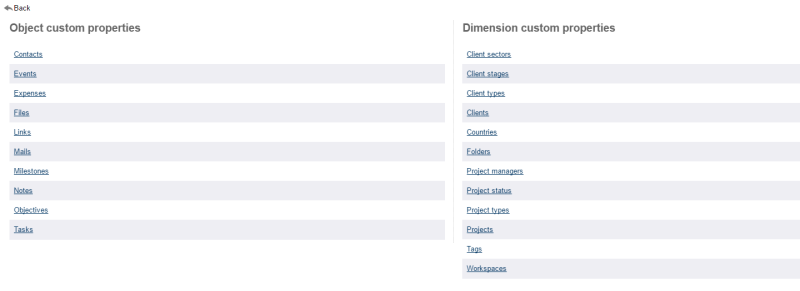
You then have to choose the object type or dimension you want to define a custom property for:
You will realize that nearly every object and dimension in Feng Office can have custom properties. You can even have custom properties for users and workspaces. The only exception from the rule are timeslots (see time module).
Custom properties look the same for all object types. The following example relates to Files, but you will have identical options for any other object type.
After clicking Add new custom property for files you get forms like in the screenshot above which offer the following options:
- Name: The name of the custom property is shown as a label attached to the input field.
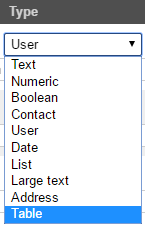
- Type: Defines the data to be stored plus the input field to be displayed:
Text- standard input field that accepts any textNumeric- standard input field that accepts numbers only (including decimal values). This custom property also provides you with the option of choosing what operation will take place when calculating listing totals (do nothing, sum, average)Boolean- checkbox (yes/no)Contact- dropdown menu for contact selectionUser- dropdown menu for user selectionDate- input field for a date with date pickerList- dropdown menu or multiselect list (depending on the optionMultiple values)Large Text- standard input field that accepts large textAddress- address input formTable- multiple input fields (rows)
- Default value: Defines the initial content of the input field. (If you set
Requiredafter it doesn't make much sense to define a default value.) - List values (comma separated): Lets you enter the available values (only for list properties).
- Description: A short text that helps the user understand what the property is meant for. It is displayed next to the label (
Name). - Is required: If set the user must fill in this field (otherwise he cannot save the record to the database).
- Multiple values: If set the user can enter more than one value. Not available for custom properties of the
Booleantype. - Show in main tab: If set the custom property is immediately visible when you open the edit view (otherwise you have to click on
Custom propertiesfirst to fold out this section).
Custom properties will be displayed in the order you define. To change the order, simply click the custom property in question and drag and drop it in the desired place.
Display and edition of custom properties
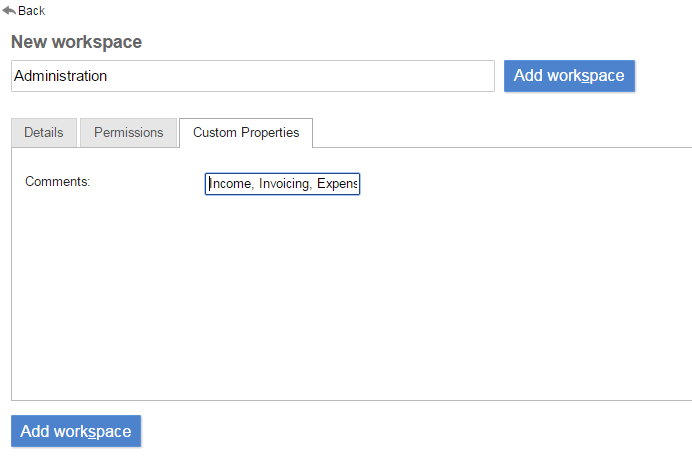
For example, when we add or edit a workspace, when we click on the Custom Properties tab, we will see the following option:
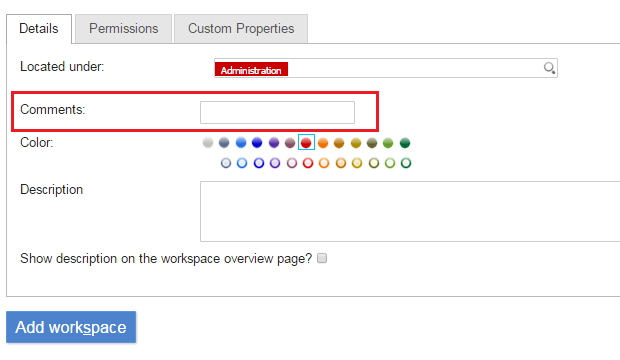
After adding the comments desired and saving the changes, when going to the overview tab of the added workspace, we will see something like this:
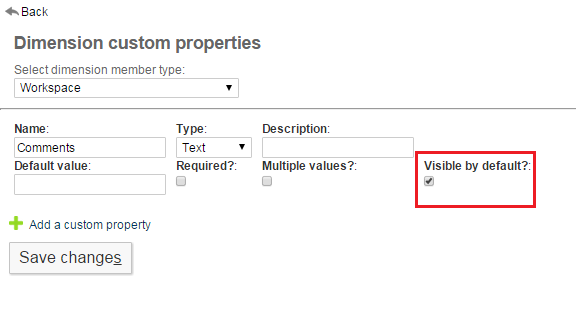
Another option you have is to select “Visible by default” when setting the custom property from the “Dimension Custom Properties” configuration:
As a result, this time the Custom Properties will not be configurable from the “Custom Properties” tab of the workspace but from the “Details” tab:
Object Subtypes
Object subtypes allow the creation, inside a module, of objects with similar categories but with different attributes and behavior. Common examples of object subtypes are subtypes of documents, tasks, metrics, and expenses. Each object type can add its own custom properties, so that the system prompts the user for the corresponding information only. Moreover, the different object types can have a different report type or HTML and PDF export process associated.
How to add an object subtype
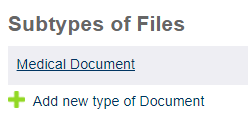
To add an object subtype, please go to Settings → Custom Properties → select the object for which you want to create the subtype → Click on “Add new type of X” You will be prompted to add the name of the new object subtype and save the changes. As an example, we will create a documents object subtype called “Medical Document”
Once we save the changes, we will see the newly created object subtype. We can access it here to start configuring its properties.
Once in the configuration form, we can set its properties in the same way we set them for the general objects (go to section Defining Custom Properties)
Please remember to save the changes.
How to use an object subtype
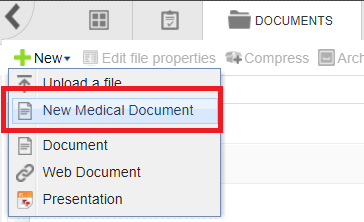
Once we have configured the new object subtype (a medical document in this example), we will see a new item in the addition options of the corresponding module:
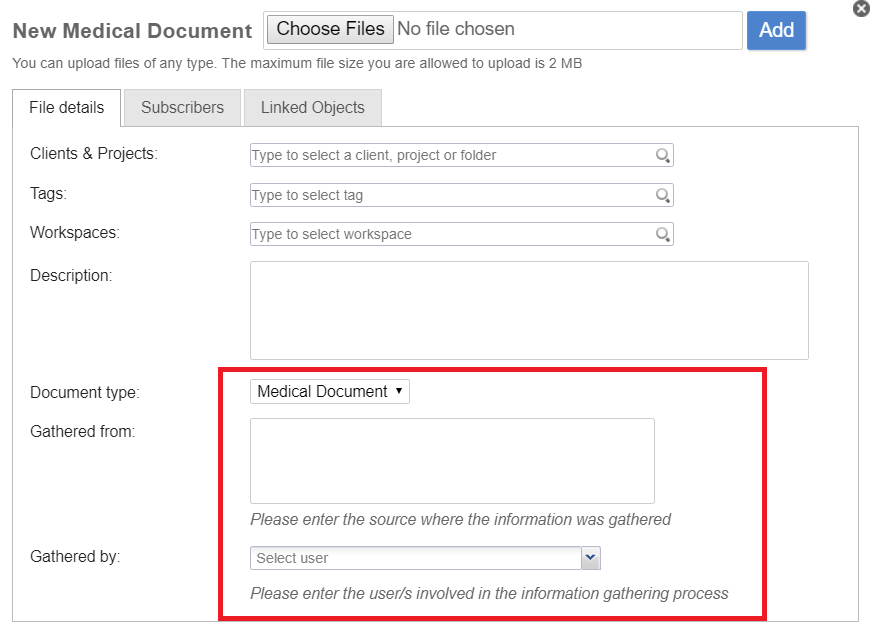
When selecting the object subtype, the specific addition form will appear, with the object subtype specific custom properties, as shown below:
NOTE: This feature is only available in the Professional and Enterprise editions of Feng Office.

